自制启动U盘,需要几个工具软件:DiskGenius、Bootice、Grub4dos。
DiskGenius
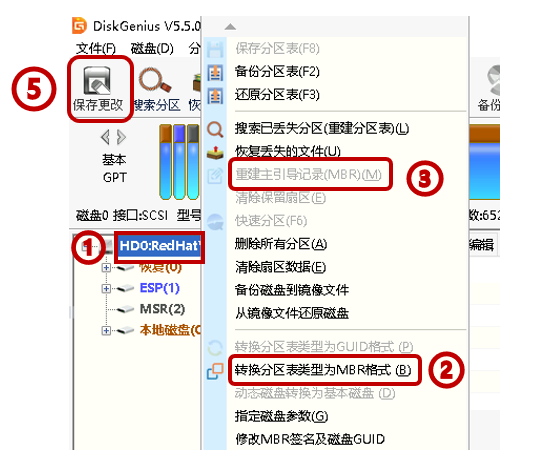
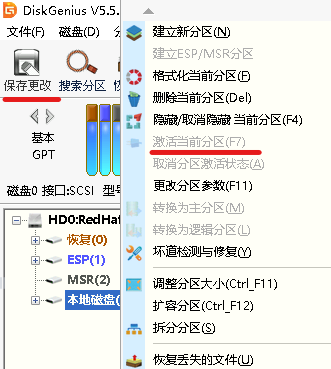
准备一个U盘,大小无所谓,实际只占用到一点点容量。先将U盘格式化成NTFS格式。打开DiskGenius,在磁盘中选择“重建主引导记录”,然后在分区中选择“激活当前分区”。最后关闭DiskGenuis。
用系统自带磁盘格式化即可。
Bootice
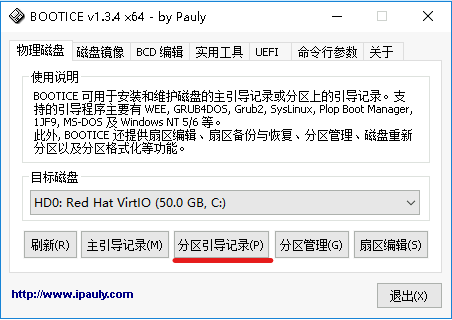
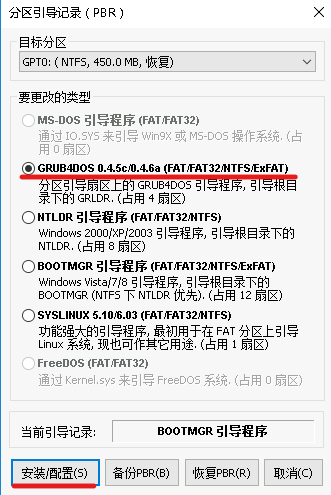
打开Bootice软件,选择磁盘为U盘或TF卡,千万别选本机的硬盘,点击“分区引导记录,选择”GRUB4DOS 0.4.5c/0.4.6a,点安装,选择版本0.4.6a,然后点“安装/配置”。
Grub4dos
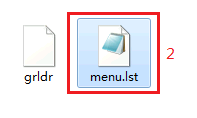
将下载的grub4dos0.4.6a的软件压缩包解压,然后把解压文件夹里的sample文件夹打开,把里面的menu.lst文件复制到的TF卡的分区根目录下,再把grub4dos0.4.6a的解压文件夹里的grldr文件复制到的TF卡的分区根目录下。
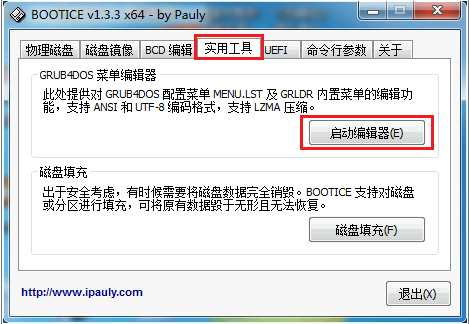
 将TF卡的分区根目录下的menu.lst菜单用BOOTICE软件的”实用工具“的”GRUB4DOS菜单编辑器“打开,把中间部分的内容全部删除,只留头尾,然后再在中间的空白部分填写新的内容,把等待的时间改为5秒。

# The old install method of booting via the stage-files has been removed.

# Please install GRLDR boot strap code to MBR with the bootlace.com

# utility under DOS/Win9x or Linux.

#

# It must be UTF-8 encoding for multi-lingual support. Font lines can be

# appended to the file. The font lines should be in the unifont.hex format.

color blue/green yellow/red white/magenta white/magenta

timeout 30——改成5——等待时间改成5秒。

## menu border color

color border=0xEEFFEE

## set vbe mode

graphicsmode -1 640:800 480:600 24:32 || graphicsmode -1 -1 -1 24:32

## loading splashimage

splashimage /boot/grub/splashimage.xpm || splashimage /boot/grub/splashimage.bmp

default /default

## Menu AutoNumber

write 0x8274 0x2001

中间部分的内容——将“中间部分的内容”全部删除

# In the end, font lines for unicode chars in unifont.hex format.

# It should include all unicode chars used in the above menu code.

# Surely normal ASCII chars are not necessary to be included here.
下面是改好了的menu.lst菜单。
# This is a sample menu.lst file. You should make some changes to it.

# The old install method of booting via the stage-files has been removed.

# Please install GRLDR boot strap code to MBR with the bootlace.com

# utility under DOS/Win9x or Linux.

#

# It must be UTF-8 encoding for multi-lingual support. Font lines can be

# appended to the file. The font lines should be in the unifont.hex format.

color blue/green yellow/red white/magenta white/magenta

timeout 5

## menu border color

color border=0xEEFFEE

## set vbe mode

graphicsmode -1 640:800 480:600 24:32 || graphicsmode -1 -1 -1 24:32

## loading splashimage

splashimage /boot/grub/splashimage.xpm || splashimage /boot/grub/splashimage.bmp

default /default

## Menu AutoNumber

write 0x8274 0x2001

title 从最后一块本地硬盘启动Windows NT/2k/XP系统

rootnoverify  (hd-1,0)

chainloader /ntldr

title 从最后一块本地硬盘启动Win7/Win8/Win10系统

rootnoverify  (hd-1,0)

chainloader /bootmgr

# In the end, font lines for unicode chars in unifont.hex format.

# It should include all unicode chars used in the above menu code.

# Surely normal ASCII chars are not necessary to be included here.
修改完后,注意要用BOOTICE软件”以UTF—8编码保存“的形式保存:
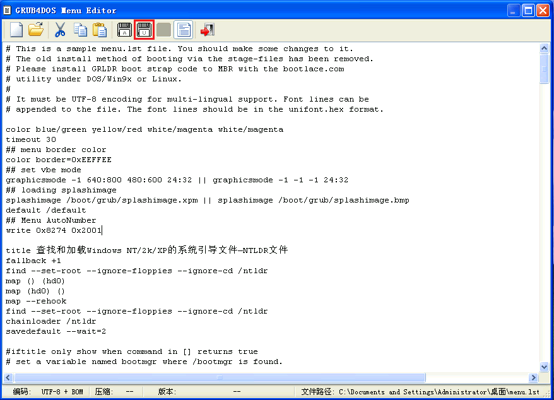 点击打红框的就会“以UTF—8编码保存“的形式保存了
最后将TF卡插入HP MicroServer Gen8服务器的TF卡插槽,并设置为USBkey启动,一开机就会出现2个菜单选项,等待时间是5秒,默认是第一个,你不做选择,5秒钟后就执行第一个菜单:
0.从最后一块本地硬盘启动Windows NT/2k/XP系统
1.从最后一块本地硬盘启动Win7/Win8/Win10系统
不过你要注意事先用启动U盘插到HP MicroServer Gen8服务器上进PE里在服务器里的接在第5个硬盘接口上的硬盘的第一分区里安装好你要的操作系统......
整个过程是:HP MicroServer Gen8服务器从USB启动——启动TF卡中的grub4dos0.4.6a——启动最后一块本地硬盘中的第一分区中的操作系统。